February 26

Bipedal Robot (Programming)

Attendance:
Jiangkung 1 Present
Poom 2 Present
Garfield 5 Present

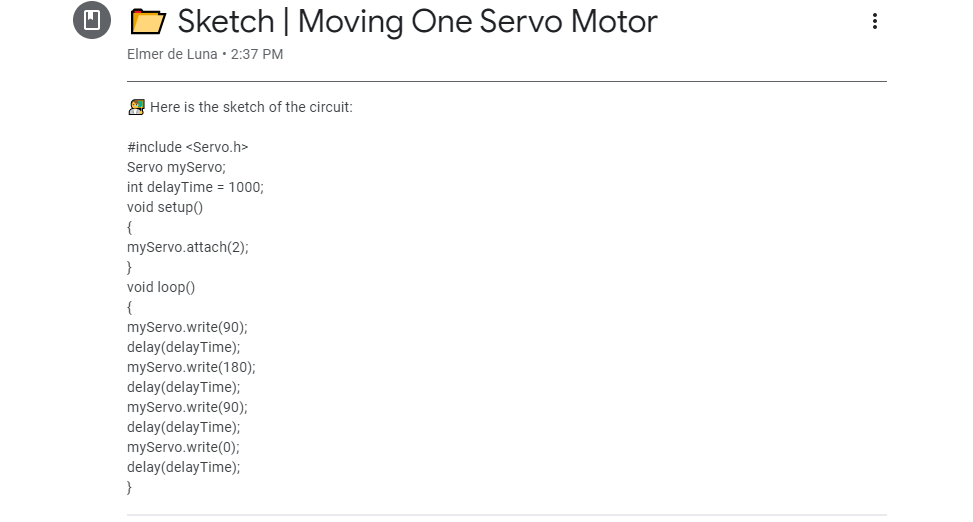
Goal: build the wire connections and program upload using four micro servo motors in Arduino

Component:

  • Arduino UNO Board
  • Micro Servo Motor (4)
  • Jumper Wires
  • BreadBoard
  • Cardboard pieces

Process

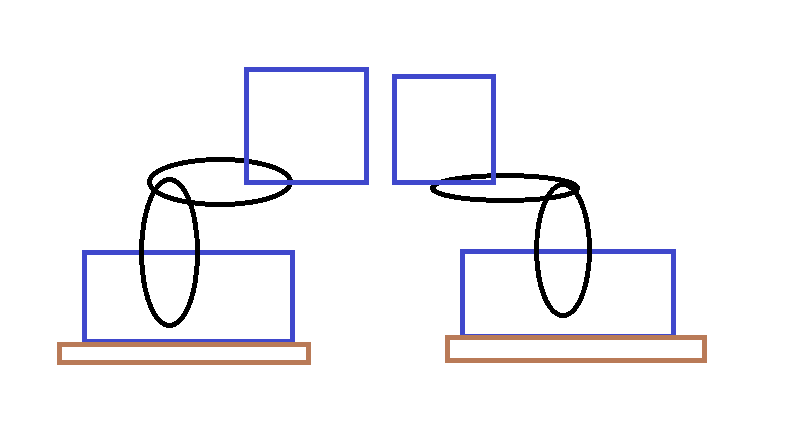
1.Add Arduino UNO board on cardboard

2.Put breadboard on top of Arduino board

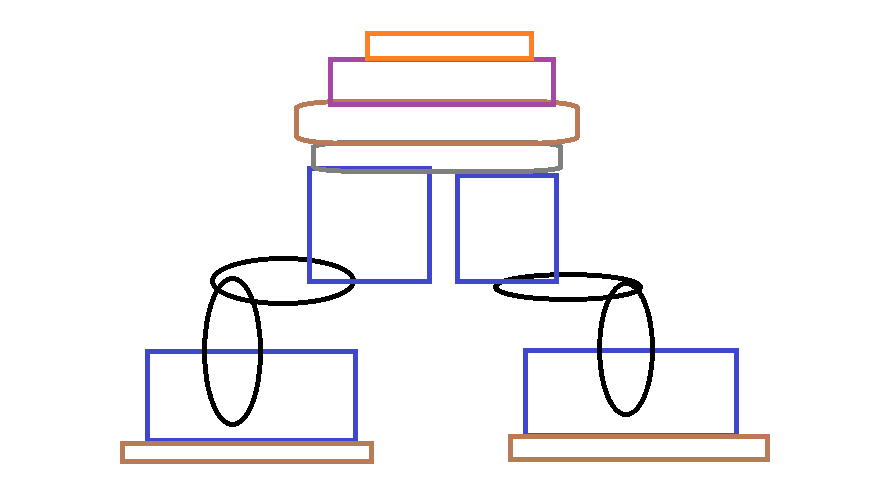
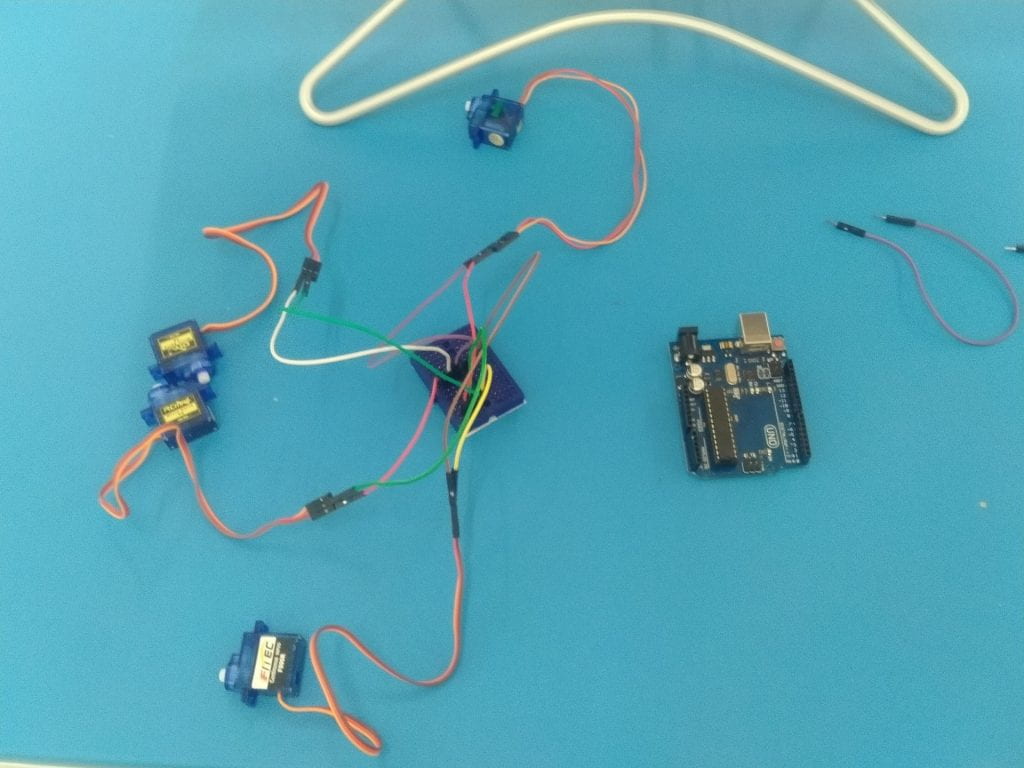
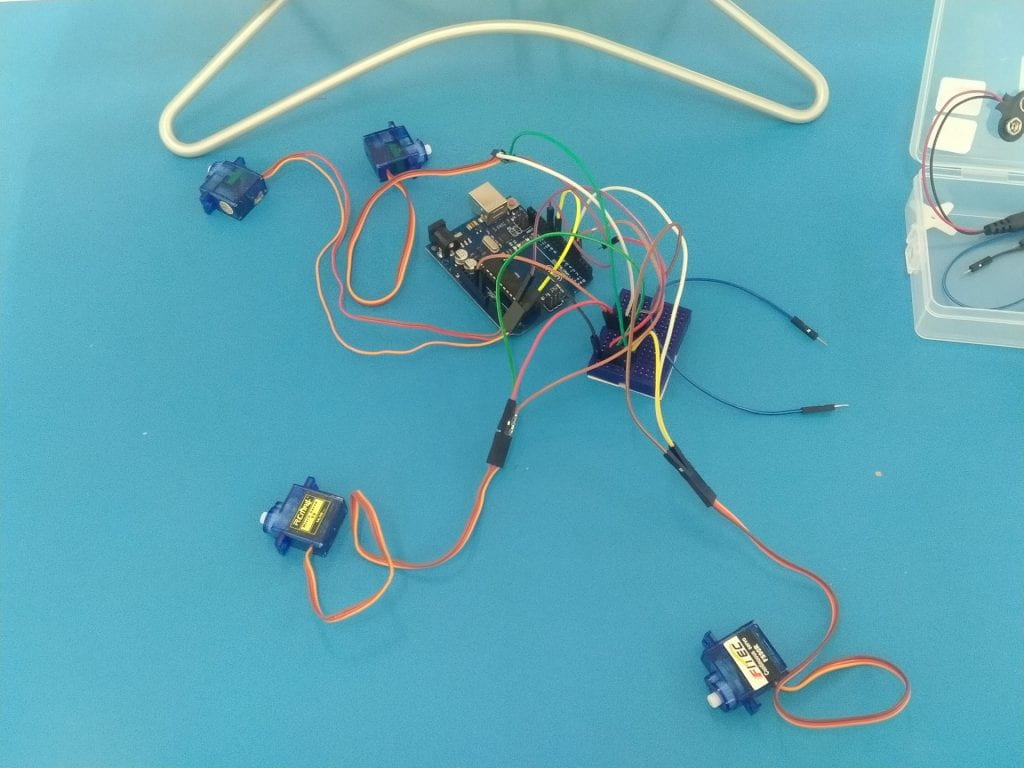
3. connect wires correctly to make it moveable

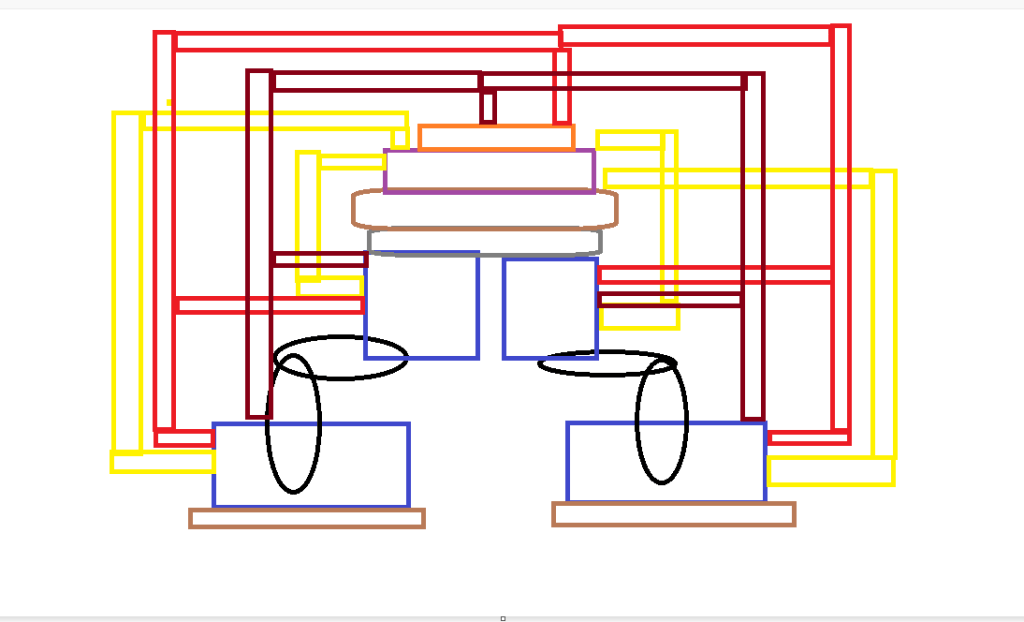
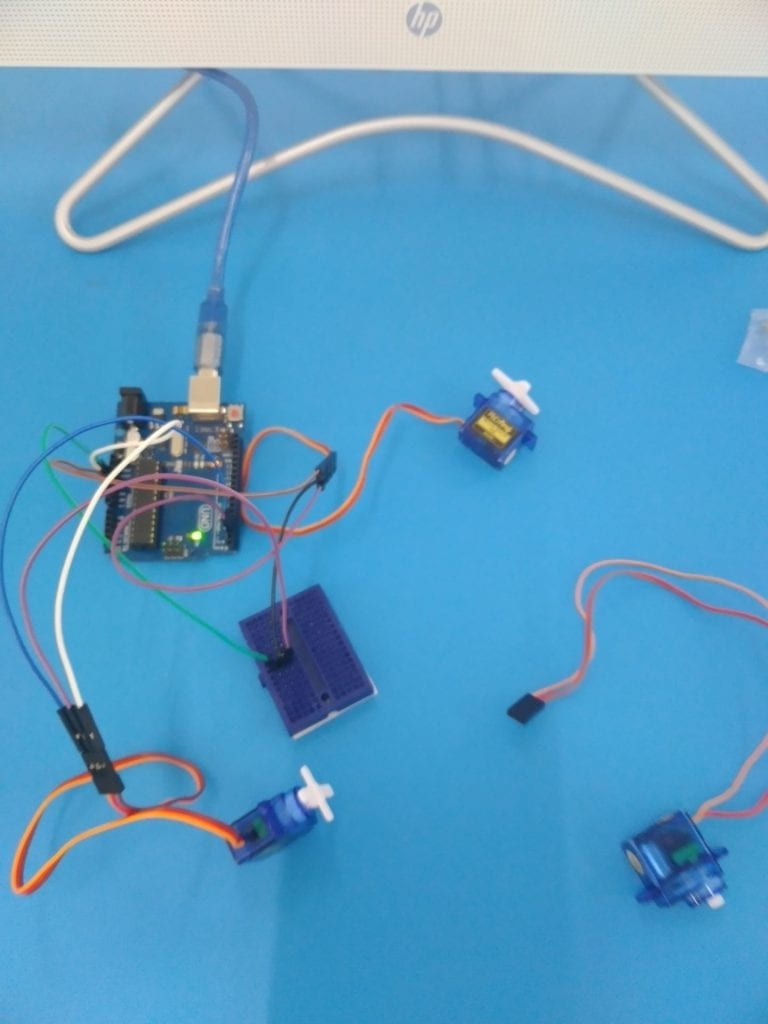
4.Plug the USB wires into robot

5.Upload this code into robot

#include <Servo.h>
Servo rightfoot;
Servo righthigh;
Servo leftfoot;
Servo leftthigh;
 int pos;
void setup()
{
rightfoot.attach(3);
righthigh.attach(5);
leftfoot.attach(9);
leftthigh.attach(6);

}


void loop()
{  int pos=120;
rightfoot.write(90);
righthigh.write(90);
leftfoot.write(90);
leftthigh.write(90);delay(500);
leftfoot.write(55);delay(400);
 for(int i=90;i<=115;i++)
 {rightfoot.write(i);delay(12);}

leftfoot.write(120);delay(100);
leftthigh.write(120);delay(100);
delay(500);
 for(int i=90;i<=120;i++)
{righthigh.write(i);delay(12);
leftthigh.write(i);delay(12);}

 leftfoot.write(90);delay(300);
 for(int i=115;i>=90;i–)
 {rightfoot.write(i);delay(12);}

delay(500);

 rightfoot.write(120);delay(300);
leftfoot.write(65);
righthigh.write(60);
for(pos=120;pos>=60;pos–)
{leftthigh.write(pos);delay(7);}
 rightfoot.write(60);

 delay(500);
  rightfoot.write(90);delay(300);
leftfoot.write(90);delay(300);
leftthigh.write(60);delay(300);

righthigh.write(60);delay(300);
 delay(500);
}

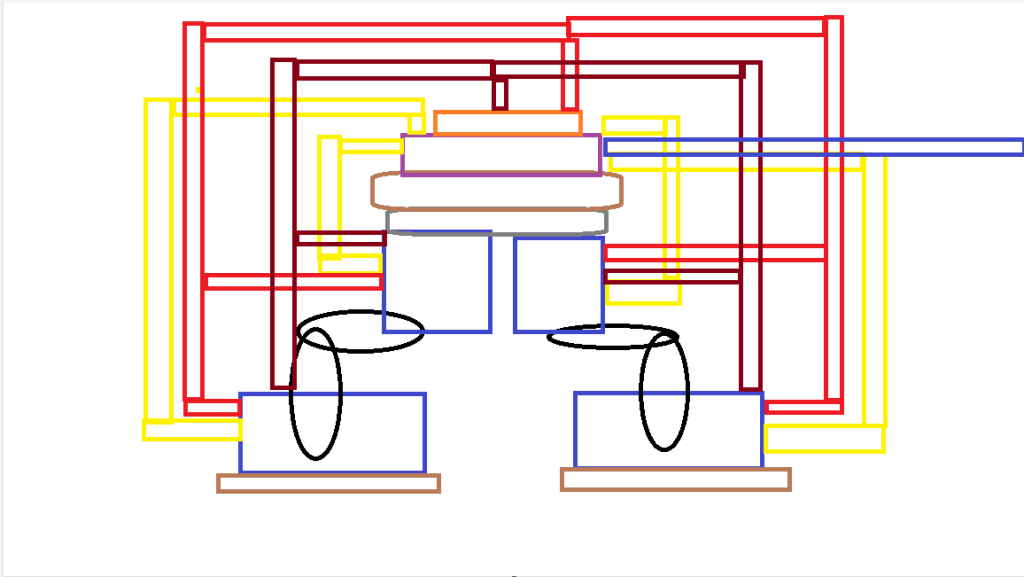
Output: (I dont have one rn so i gonna explain)
The robot’s legs should be moving side to side or maybe front to front

February 13

Bipedal Robot (Prototype)

Attendance:

01 Jiangkung Present

02 Poom Present

05 Garfield Present

Task: Building the Bipedal Robot

Components:

Arduino board

Breadboard

Jumper wires

Servo motor

Process :

1. put a Micro Servo Motor on top of cardboard for feet (left)

2.put a Micro Servo Motor on top of cardboard for feet (right)

3. connect servo horn into both of them and face upfront

4.connect others servo motor on top of robot feet and use hot glue on servo horn when it near each others

5. put tape/hot glue on top of thigh(both side)

6.put cardboard on top of tape/hot glue

Output

January 30

Four Micro Servo Motors

Attendance: 01 Jiangkung Present
02 Poom Present
05 Garfield Present

Task: Build the four servo motor circuit

Components:

☑️ UNO Board Arduino
☑️ USB cable
☑️ Micro Servo Motor (4)
☑️ Jumper Wires
☑️ Mini breadboard

Process :

1.Prepare components

2.connect red wires to the same row

3.connect brown wires to the same row

4.connect yellow wires to 3 , 5 , 9, 11

5. connect new wires in the same red and brown row and connect them to 5v and GND

OUTPUT
December 26

HAPPY NEW YEAR

Say good bye to 2022 and say welcome to 2023


PLS DONT GIVE US HARD WORK!

🗿 Moai Emoji | Moyai Emoji

PLS IM BEGGING YOU OR I WILL SENT YOU TO THE DEPTH

Don't ask : r/deepwoken

AND HAPPY NEW YEAR TO TEACHER ELMER

see you next year and dont forgot to give us 40 point

December 20

Centering and Moving Two Micro Servo Motors

Attendance: 01Jiangkung present
02 Poom present
05 Garfield present

Task: building two micro servo motors circuit in Arduino

Components: 1 Arduino UNO Board
1 USB cable
2 Micro Servo Motor
7 Jumper Wires
1 Breadboard

Process: 1.Prepare all component we needed

2. Connect all wires from micro servo motor(front) to breadboard and Arduino Uno Board by following Schematic

3. Connect all wires from micro servo motor(rear) to breadboard and Arduino Uno Board but this time we added 1 more jumper wires from breadboard to 5V

4. connect USB cable to computer then have fun

Result:

November 28

One Micro Servo Motor

Attendance

Present – 01 Jiangkung

Present – 02 Poom

Present – 05 Garfield

Present – 22 Kamn

Task

We built one micro servo motor

Components :

Arduino UNO Board
USB cable
1 Micro Servo Motor
3 Jumper Wires

Process

1.Prepare the equipment you will need.

2.Connecting the motor to the jumper wire will allow you to put each component together. Put the turbine on the motor after connecting it to the board. (red – power 5V brown – GND Yellow – signal D2)

3.open Arduino sketch nova and copy the code

4.have fun

Thx for watching
November 21

Our Team

Hello to whoever reading this. We are paradon team this team’s name based on my friend>:]. who made me got 2 wrong answer in math test so bad>:(
and this is our member

Lead Engineer: POOM 02

Here his’s face reveal

His name is POOM. He smart but lazy

Engineer: ERROR 244
STATUES: GONE

Programmer: Jiangkung 01

Here his’s face reveal

His name is Jiangkung. That all.

Digital jouralist: Garfield 05

Here his’s face reveal

His name is Garfield. He’s a weirdo

MEDIA PROGRAMMER: KAMN 22

Here her’s face reveal

Her name is kamn and she got boyfriend.

“Computer died if battery are gone”

Jiangkung(me):>